 Audiogravity
3. First run — guided audio setup
The first time you open Audiogravity, a few guided steps take you from a bare box to music playing — without touching a config file.
1. Your trial activates automatically
A 30-day trial — full access to every Pro feature — is activated on first run. No action required, no card. When it ends you can keep using the free Starter features or buy a lifetime licence (see 7. Administration → Licence).
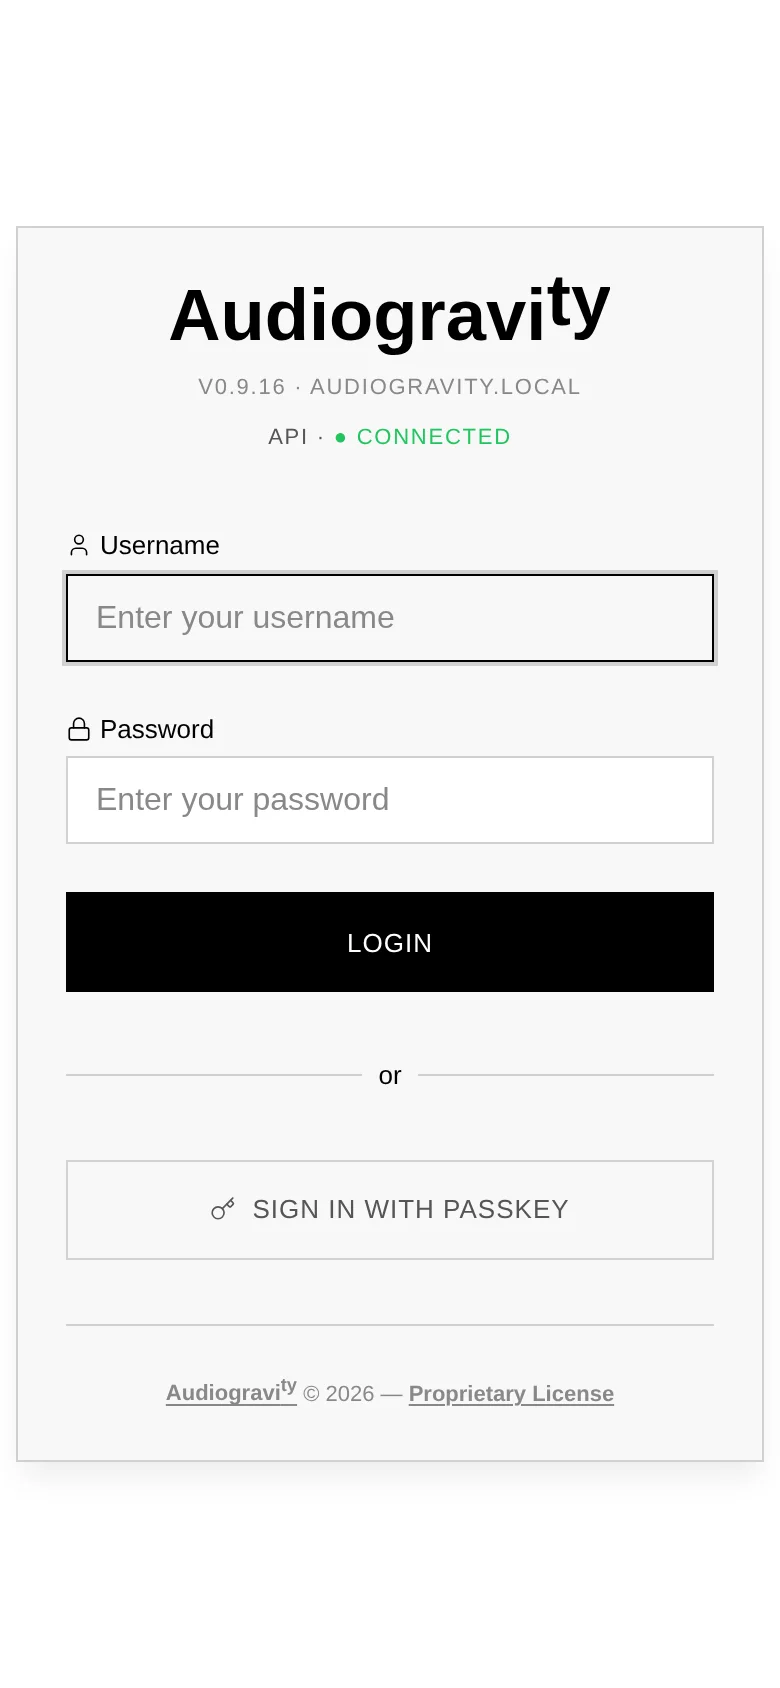
2. Sign in — and secure your account
Audiogravity ships with one administrator account: username admin,
password admin123. Sign in with it, then change the password right away
(Admin tab → your user card) — the default is public knowledge.
After your first password login, Audiogravity offers to register a
passkey on the device — Face ID, Touch ID, a fingerprint or a hardware key.
Accept, and every later login becomes a tap: the login screen recognises the device
and asks for the passkey directly, with Use password instead as the fallback.
(Passkeys require Audiogravity to be reachable over a real HTTPS
domain — see the --public-url flag in 2. Installation.)
More accounts — family members, a read-only guest — can be added later from the Admin tab (see 7. Administration).
3. Install the audio engines
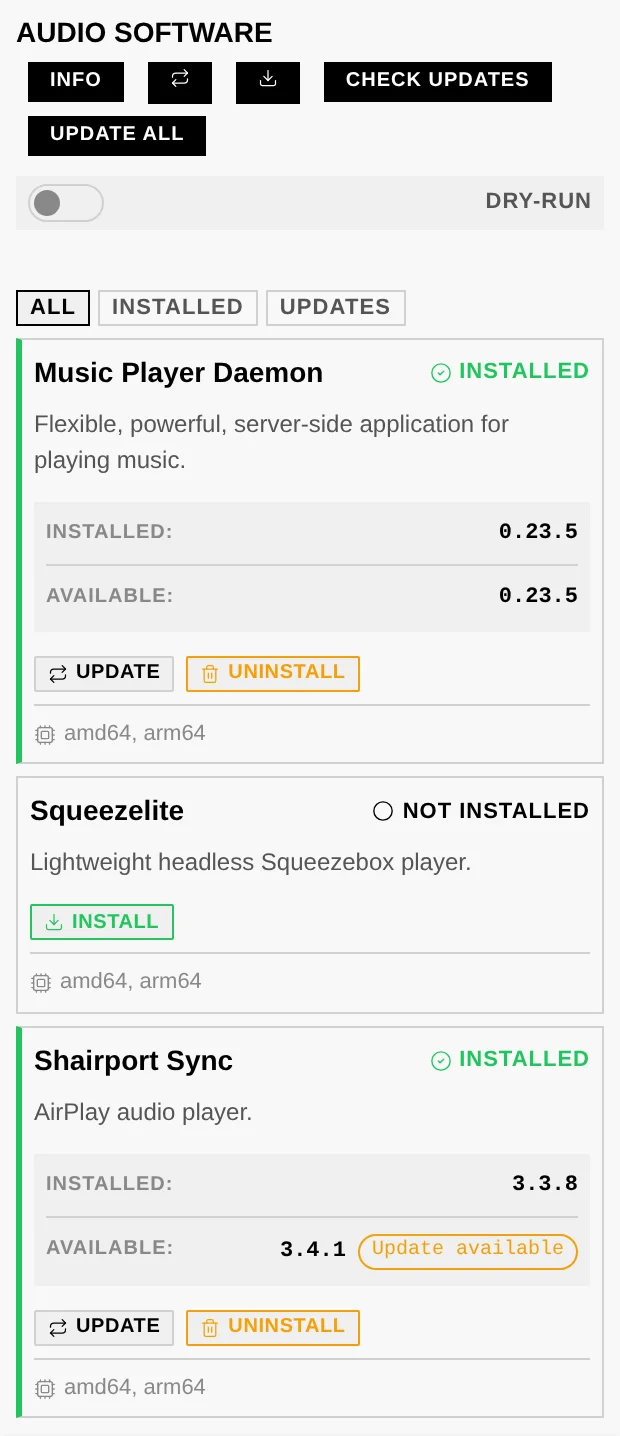
The installer sets up Audiogravity itself — not the audio engines it conducts. On a fresh box, install those first from the Audio Software tab (see 7. Administration → Audio Software): each engine has a card with an INSTALL button.
- Music Player Daemon (MPD) — the core player. Install this one first: it plays your local library and carries Qobuz, Tidal, HIGHRESAUDIO and internet radio.
- Shairport Sync — to receive AirPlay.
- UPnP Bridge (upmpdcli) — to expose the box as a UPnP renderer other apps can cast to.
- Roon Bridge / Roon Server / HQPlayer NAA — only if you use Roon or HQPlayer.
Install what you need now — you can always come back for the rest later.
4. Configure the audio stack (guided)
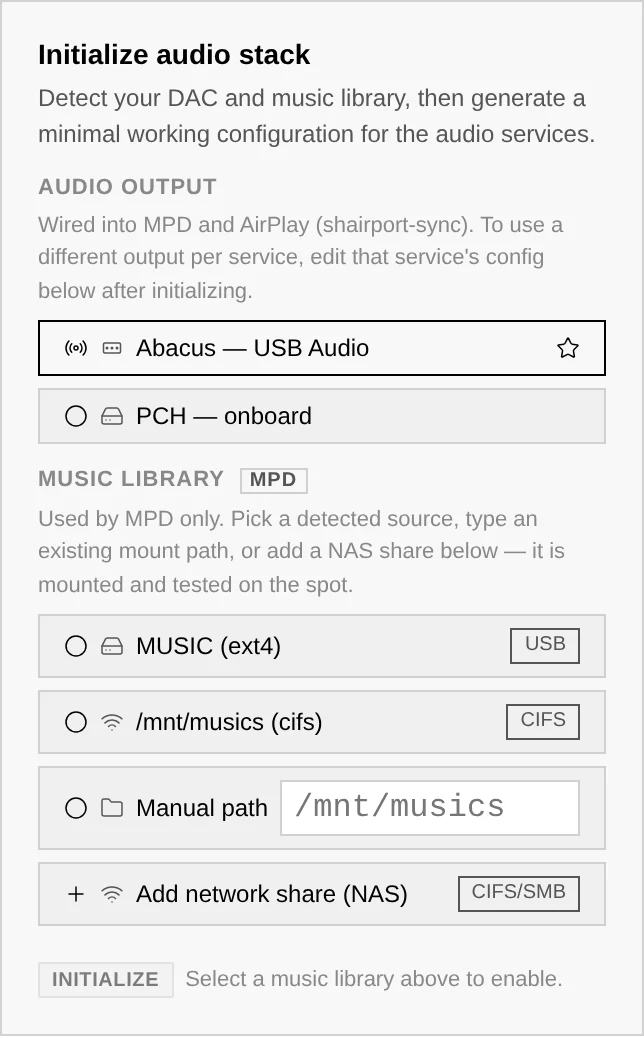
On a new box, the Config tab shows an Initialize audio stack panel (administrators only). It:
- Auto-detects your DAC and your music library.
- Generates a minimal, bit-perfect configuration for the three audio services — MPD (local library), AirPlay (shairport-sync) and UPnP (upmpdcli) — all wired to the output you choose.
- Asks for your admin password before applying.
Once at least one service is set up, the panel disappears and each MPD / AirPlay / UPnP tile shows a CONFIGURED badge.
Why "bit-perfect"? The generated configs send audio to your DAC untouched — no resampling, no volume math in the digital domain — so what your DAC receives is exactly what the file contains.
Raspberry Pi with a HAT DAC? A board stacked on the GPIO header is not detected until Linux is told it exists, so it will be missing from this panel. Declare it once at the OS level — see 9. Troubleshooting → My DAC is not in the output list — then come back here.
The DAC stays put
When you configure a USB DAC, Audiogravity pins its sound-card index at the OS level. Linux then always gives that DAC the same number, even after a reboot or a USB re-plug — so the output your services target never drifts and nothing needs re-checking at startup.
Per-service outputs
Each service can target its own output. For example: MPD on your USB hi-res DAC, AirPlay on the optical out. Change any service's output later from the Guided editor (see below) in a couple of clicks.
Music on a NAS? Add the share from the picker
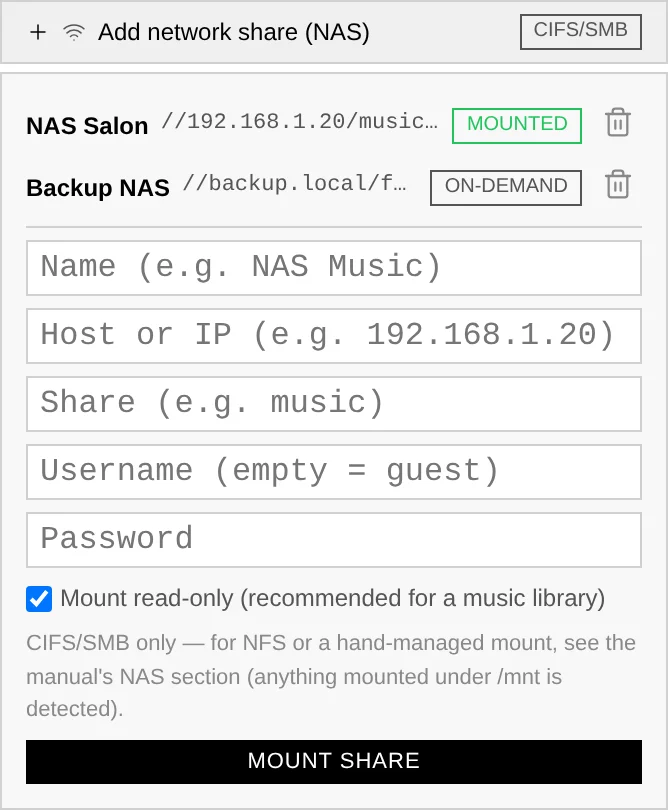
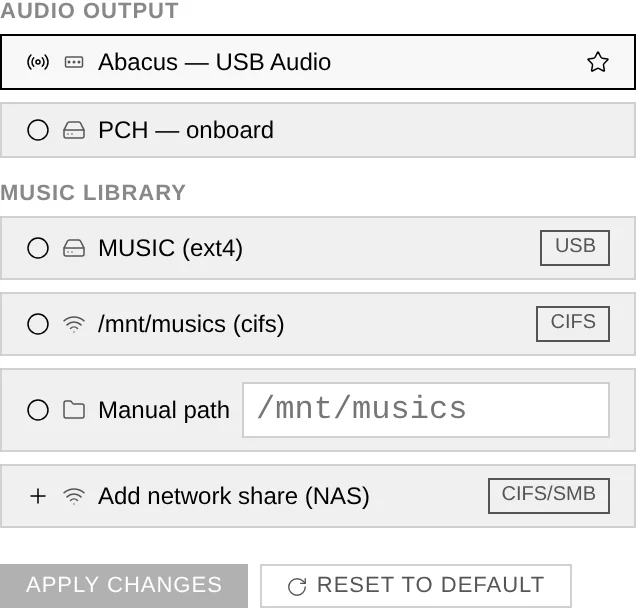
The Music library picker lists what the box can already see: USB drives (ext4 / exFAT) and existing mounts. For a NAS share (CIFS/SMB — what Synology, QNAP and every mainstream NAS speak), use Add network share (NAS) at the bottom of the picker: give it a name, the NAS host, the share name and — unless it's a guest share — its username and password. Audiogravity mounts and tests the share on the spot: on success it appears in the list, pre-selected; on failure you get the actual mount error (wrong password, unreachable host) and nothing is left behind.
Under the hood this creates a systemd mount-on-access unit — robust to a NAS that is off at boot — with the credentials in a root-only file, mounted read-only by default.
Adding a share mounts and selects it, but does not yet make it MPD's library on its own — that's the same two-step rule as any source: pick it in the picker, then confirm — click INITIALIZE (in the panel) or Apply (in the Guided editor) to actually point MPD at it. That confirm step also starts a library scan so the new music is indexed and shows up in the Library view (a large NAS keeps indexing in the background — give it a moment). To remove a share, reopen the panel: each one it created is listed with its state (mounted / on-demand) and a trash button — removing one it isn't currently using takes effect immediately; if the share is MPD's active library, it warns you first.
Prefer the terminal, or need NFS? Any share you mount yourself at the OS level (fstab or systemd units, CIFS or NFS) under
/mntis detected exactly the same way — see 9. Troubleshooting → Manual NAS mount for the recipe. NFS is terminal-only by design: mounting it from the UI would require RPC daemons on the box, which Audiogravity refuses on an audio appliance.
5. Change output or library later (Guided mode)
For MPD, AirPlay and UPnP, the Config editor opens in a Guided view where you change the audio output or music library in a couple of clicks. Only the setting you touch is rewritten — the rest of your config is preserved. A Reset to default action regenerates a clean minimal config (admin password required; your current file is backed up first).
6. Find your way around
The tab bar (across the top, or a sidebar in the vertical layout) is the app's map:
- Profiles · Services · Audio Software · Systemd · Performance · Config · System — running the box: audio scenarios, service control, engine installs, OS tuning, config files and monitoring (all covered in 7. Administration).
- Pipeline — the live signal-path view (Pro; see 6. Outputs & engines).
- Library (Pro) — browse, search, queue, sources and outputs: where you play music.
- Admin — users and access, announcements, updates and the licence.
- Manual — this manual, readable inside the app.
On a Starter licence the Pro tabs carry a small lock — tapping one opens the licence panel. Config is not one of them: editing a service's configuration file and the guided setup are available on every edition — configuring the machine is part of owning it. The sticky Now Playing bar sits above the footer whatever the tab, and the gear in the top bar opens Settings.
7. Install it as an app (recommended on phones)
Audiogravity is an installable web app (PWA): added to your home screen it opens fullscreen, in its own window, with the app icon.
- Android — open the site in Chrome and accept the Install app prompt (or browser menu → Add to Home screen). The installed app also honours the Portrait Lock at the OS level.
- iPhone / iPad — in Safari, tap Share → Add to Home Screen. On iOS this is also required for push notifications: Safari tabs can't receive them, the installed app can (see 7. Administration → Push notifications).
- Desktop — Chrome and Edge offer an install icon in the address bar; handy for a dedicated always-open controller window.
Next
Your box now plays. Head to 4. Listening to start playing music, or 5. Library & streaming to connect Qobuz, Tidal, HIGHRESAUDIO and internet radio.